- Published on
Temperature Tracking with API Gateway and Lambda
- Authors

- Name
- Linell Bonnette
The SchoolStatus office has two wings, roughly split into developers on one side and non-developers on the other side. The non-developer side of the office feels a lot colder than the dev side. To prove the point, Levi, a developer on the predominantly non-developer side, built a little device that records the temperature, atmospheric pressure, and humidity.
Now, I'm not sure of all of the specifics of exactly how the device works but I have wanted to do something cool with API Gateway and Lambda that actually served a purpose. So here's what we did to create What's My Temp Again.
The first step was easy. I really just need two endpoints -- one to ingest data and one to spit it out for another service to pick up and display. Making this happen is surprisingly simple.
In the API Gateway dashboard, just click the "Create API" button. You'll need to give it a name, there's an optional description, then you've got to pick an endpoint type. I went with regional because we're all physically located in the US East region anyway.
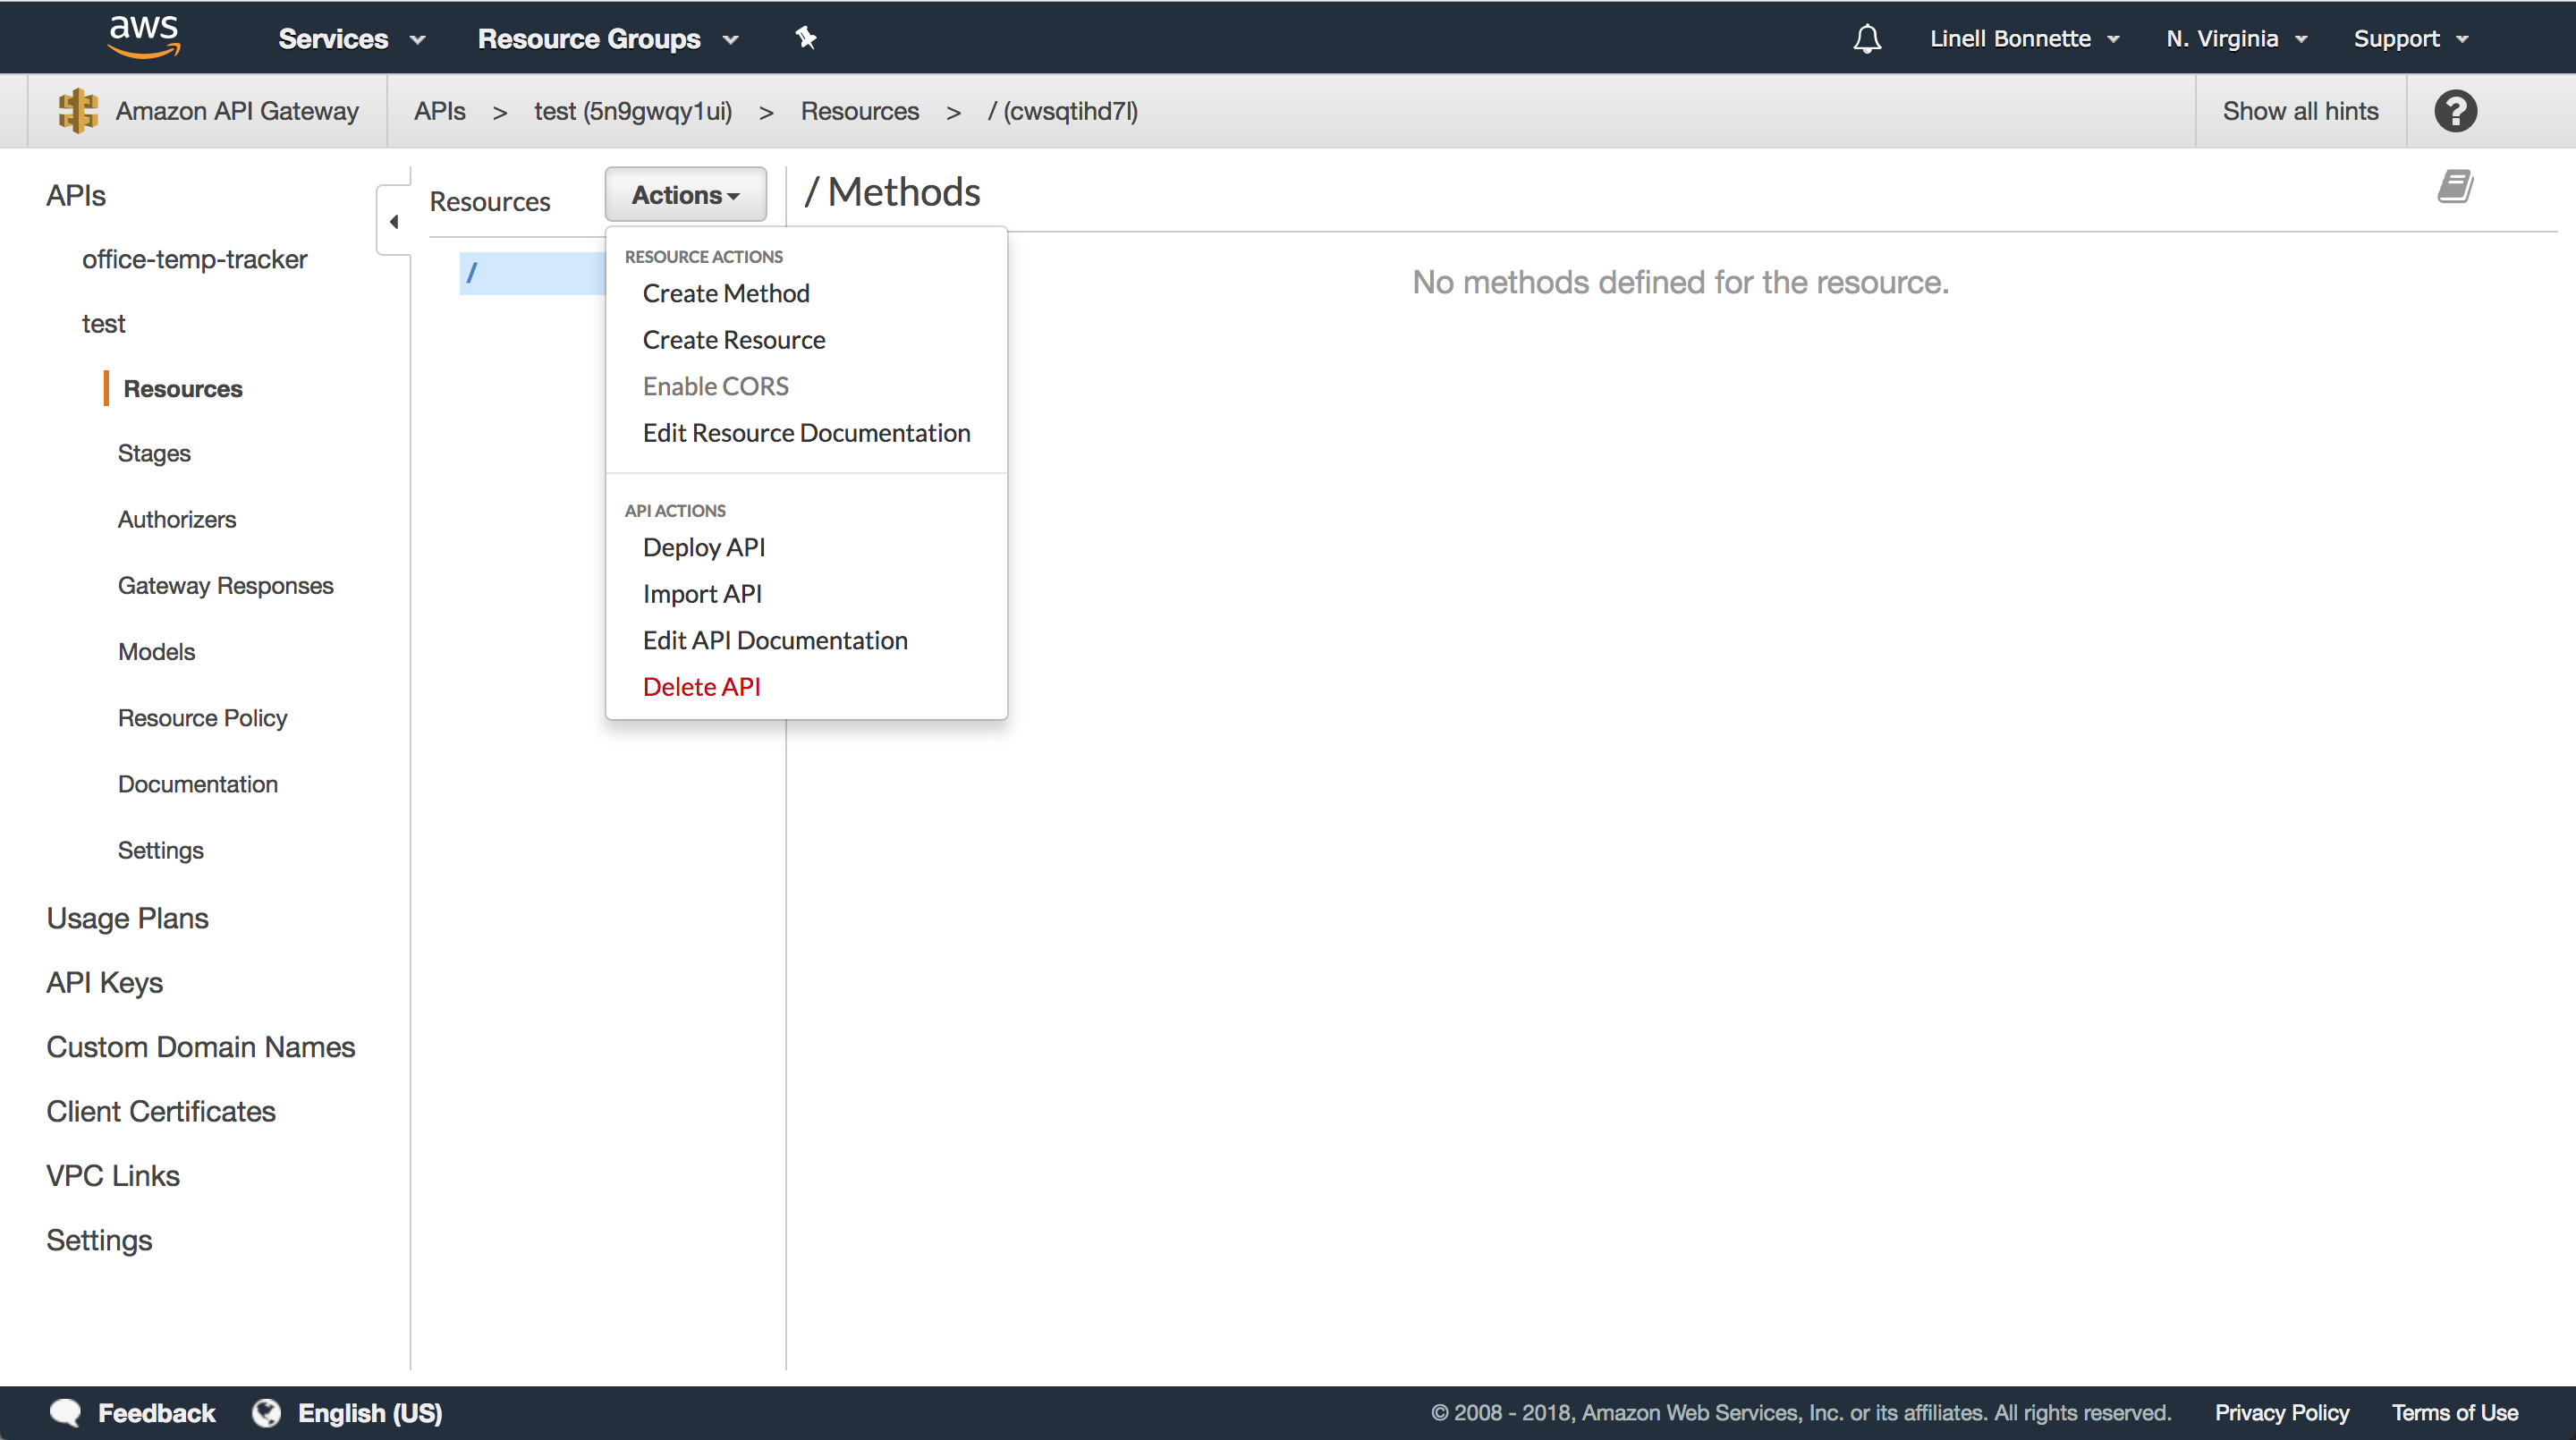
Now that we've got an API, we need to create a resource. We'll eventually create GET and POST methods on this resource. You can directly attach these to the / resource, but I have a few things planned in the future so I wanted to keep this namespaced to a /temperature resource. So click the "Actions" button and then select "Create Resource".
You don't want a proxy resource, and everything else is pretty self explanatory. Fill out your name, path, select whether or not to enable CORS (I selected yes, but there's a trick here we'll talk about later), and then click "Create Resource".
Now that we've got our resource, we need to add those GET and POST methods. You'll notice that API Gateway helpfully gave us an OPTIONS method if you chose to enable CORS. To add a method to this resource is as easy as making sure the /temperature resource is selected, clicking to the "Actions" button, and selecting "Create Method". A little select box appears in which you can select the HTTP method that you'd like to add. Let's start with the POST request that we'll use to take data from Levi's sensor and insert it into a DynamoDB table.
Now, in order to completely create this method we're going to need to create a function in Lambda to handle actually grabbing the data and inserting it into the table. To accomplish this, go to "Services" and then choose "Lambda". In the resulting dashboard, go ahead and click "Create function". In order to save time, I'm going to give you the code that I ended up hacking together, but it's worth noting that this code came from using the blueprint microservice-http-endpoint.
const doc    = require('dynamodb-doc');
const dynamo = new doc.DynamoDB();
const uuid   = require('uuid');

exports.handler = (event, context, callback) => {
    console.log(event);
    const tableName = 'temperature';
    const body      = JSON.parse(event.body);
    console.log(body);
    const item      = {
        id: uuid.v1(),
        temperature:      body.temperature,
        pressure:         body.pressure,
        relativeHumidity: body.rh,
        timestamp:       Date.now()
    };

    const done = (err, res) => callback(null, {
        statusCode: err ? '400' : '200',
        body: err ? err.message : JSON.stringify(res),
        headers: {
            'Content-Type': 'application/json',
        },
    });

    dynamo.putItem({TableName: tableName, Item: item}, done);
};
In order to make this work, you'll need to create a DynamoDB table that accepts the properties you see being assigned to item above. To do this, go to "Services" and then "DynamoDB" and click "Create Table". I used temperature for table name, id of type string for the primary key, and timestamp of type number for the sort key.
Now that we've actually got the table, we can test our lambda function. In the "Select a test event" select box, choose "Configure test event". You can see the JSON for the event I'm using to test in this gist. You should now be able to successfully test the event and go into your DynamoDB table and see the newly created data. We're finally ready to head back into APIGateway and hook the POST endpoint up to this function.
If you haven't already created the method then do so, and then simply go into the configuration page, select "Lambda Function" as the integration type and then search for and select the correct lambda function in the "Lambda Function" field. Click the save button. The final step is to deploy the API, which we can do via the "Actions" button and then selecting "Deploy API". You'll have to select [New Stage] as the deployment stage and then give it a name and a description. I used edge as my stage's name. Now just hit the "Deploy" button. The resulting screen will have an "Invoke URL" on it that you can now use to hit your resource! The URL will look something like
https://5n1gwqy1ux.execute-api.us-east-1.amazonaws.com/edge
It's worth noting that for this example you need to actually access the /temperature resource. Go ahead and poke around with curl or a HTTP client and you'll be able to insert data into you DynamoDB table.
The final step is to create the GET method and the corresponding Lambda function. At this point the process is old had, so I'm just going to give you the code I'm using for the function.
const doc    = require('dynamodb-doc');
const dynamo = new doc.DynamoDB();

exports.handler = (event, context, callback) => {
    const done = (err, res) => callback(null, {
        statusCode: err ? '400' : '200',
        body: err ? err.message : JSON.stringify(res),
        headers: {
            'Content-Type':                'application/json',
            'Access-Control-Allow-Origin': '*'
        },
    });

    dynamo.scan({ TableName: 'temperature' }, done);
};
The one thing that's really important to note is that I'm adding Access-Control-Allow-Origin to the respone headers. When we set up CORS on the API as a whole, that doesn't carry over into these response headers and if you don't do this, you'll end up getting CORS errors when calling the endpoint for this function. Note that you'll need to redeploy the API to ensure that the new endpoint is available after it is created, but you don't have to re-deploy if you're only changing code in the Lambda function. One final note is that you could really combine these two functions into one that responds differently for different HTTP methods. If you use the blueprint mentioned above, you'll see that it's actually doing that very thing. I personally think it's just cleaner feeling to have the separate, for now.
At this point you should have an API that's just barely good enough to power an office temperature tracker API! There are plenty of other cool things we could do, but it's pretty crazy that I was able to create and deploy in just a few minutes without spending more than a few minutes confuring anything resembling a server.